


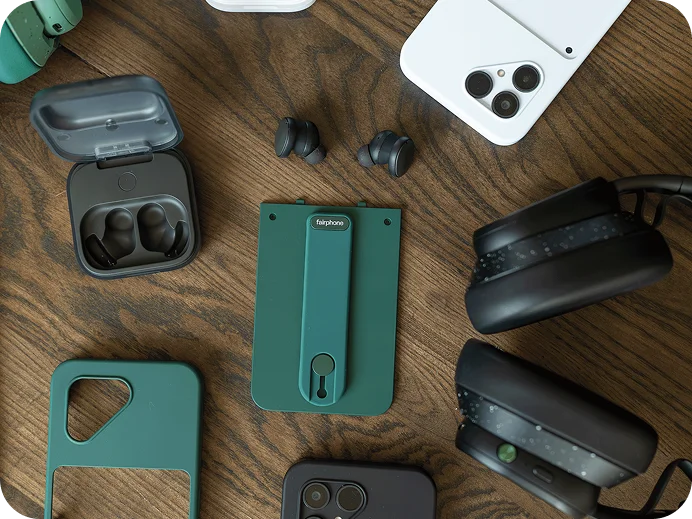
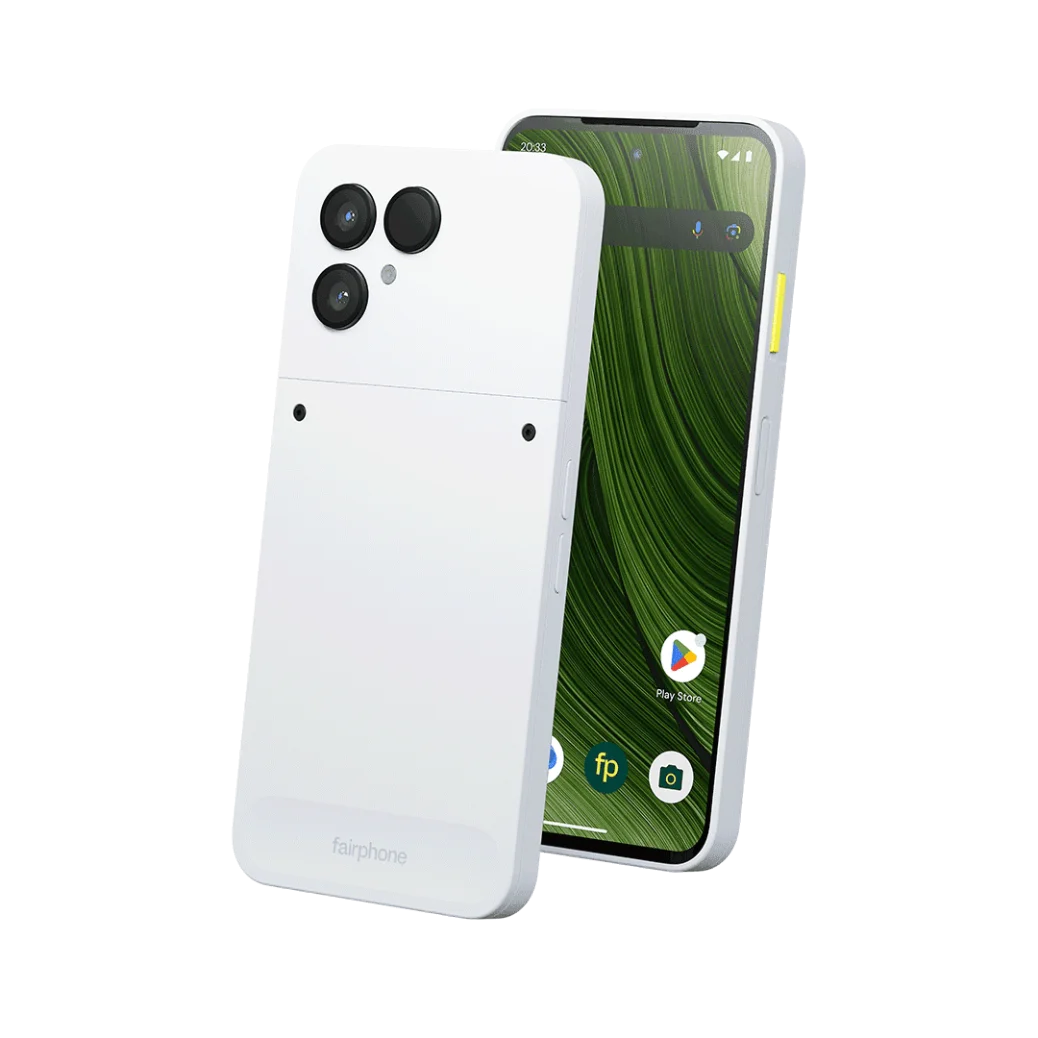
Switching to fair is easy
Get your Fairphone going in a few, simple steps
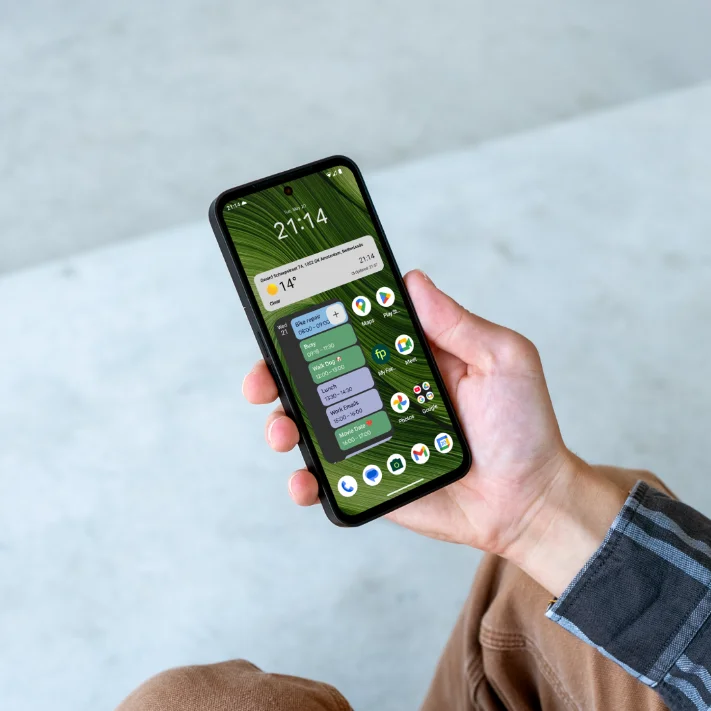
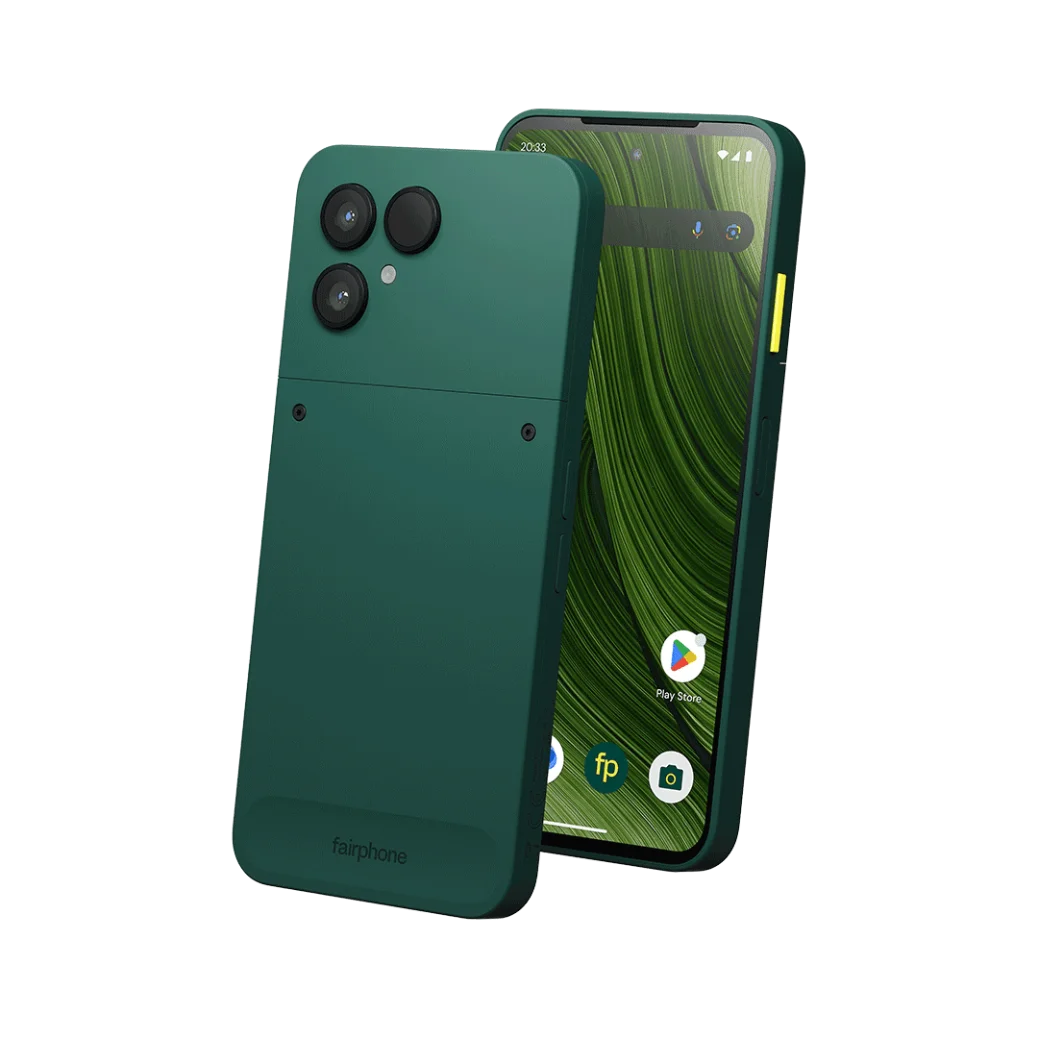
Intuitive in all the right ways
Welcome to a whole new smartphone experience, that's familiar yet unique. With industry-leading software support and a highly customizable Android OS, you can easily keep your Fairphone going at least ten years, maybe even more. What’s more, you can see the impact you're making every day!
Looking for a more privacy-focused OS?
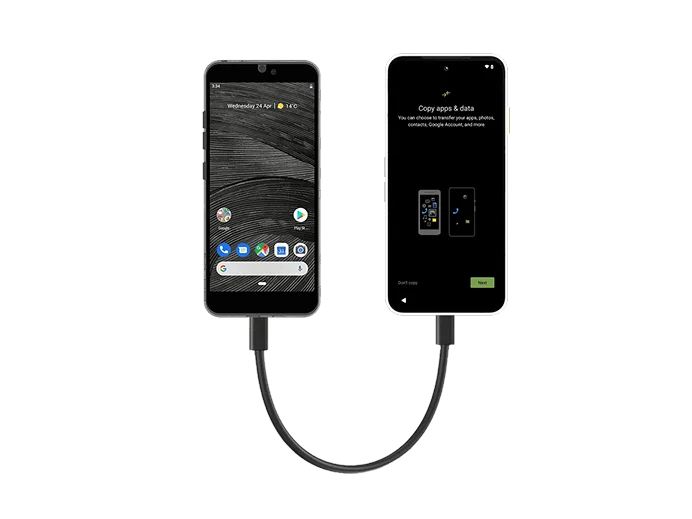
Securely transfer all your data
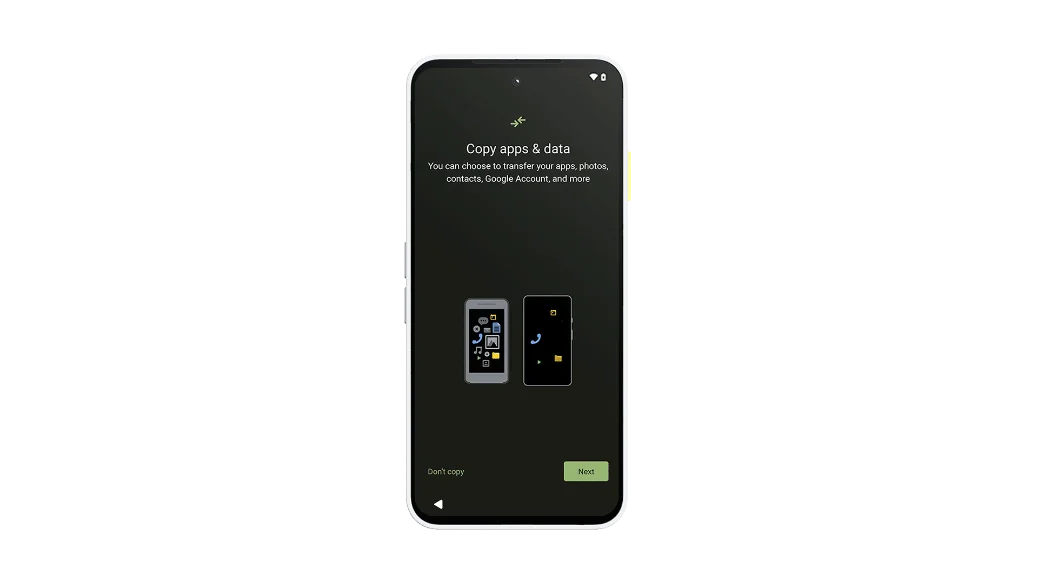
- Start your new Fairphone with all your old apps in place
- Transfer your contacts, photos and more from any phone
- Switch from your old device in minutes
Copy your data
My previous device runs on...
I want to copy data...
I want to copy data...
I want to copy data...
Before you start
- Charge both devices.
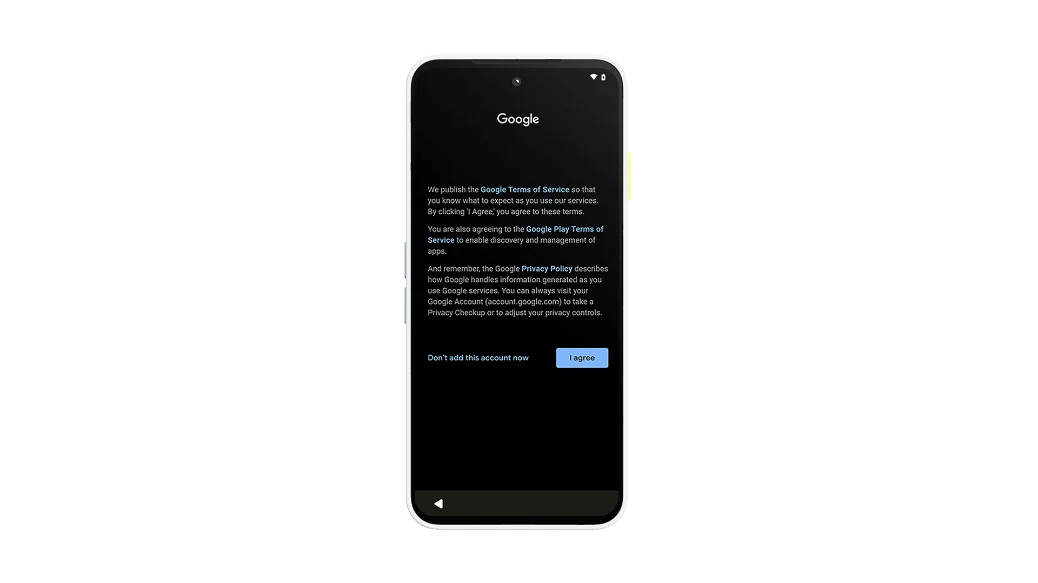
- If you don't have one, create a Google account.
- On your old device:
- Make sure you can unlock it with a PIN, pattern, or password.
- Connect to a stable Wi-Fi network.
- Back up your data.
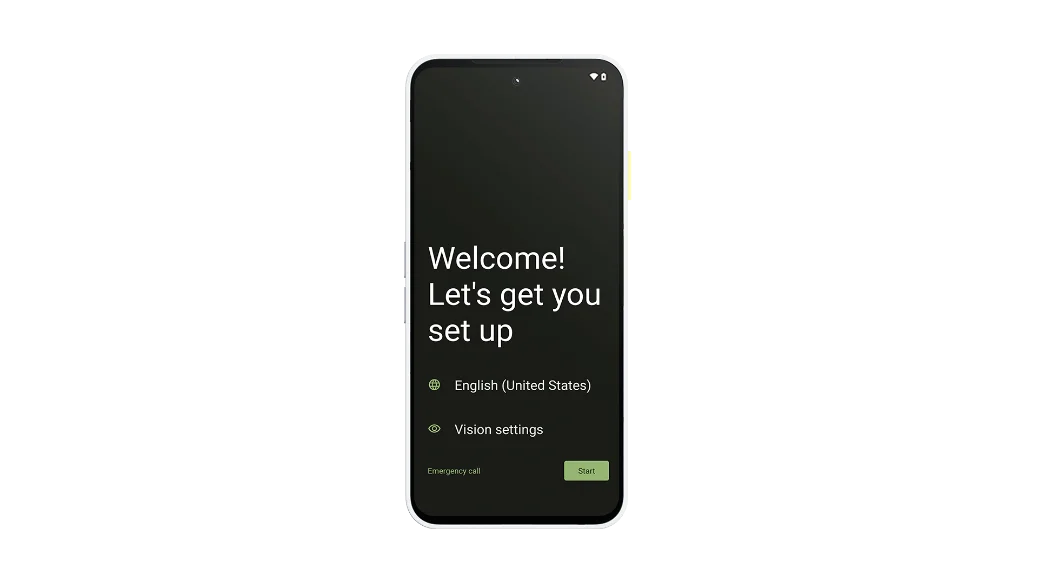
Step 1
- Turn on your new Fairphone and tap Start.

Step 2
- Connect to a mobile network:
- Insert a SIM card or tap Download a new eSIM.
- Tap Skip.
OR
Step 3
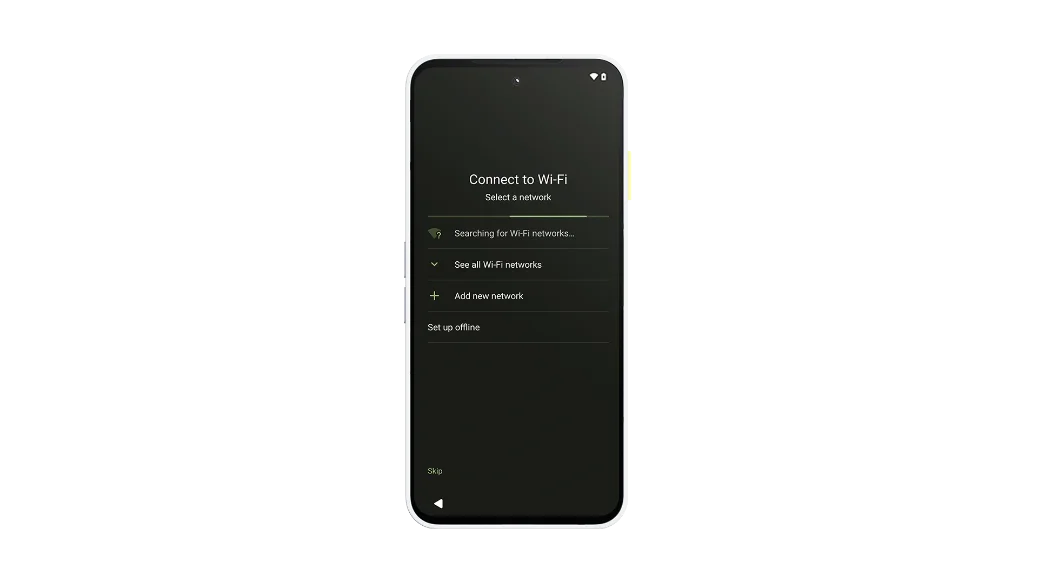
- Connect to Wi-Fi:
- Tap your network name to connect.
- Tap Set up offline.
OR

Step 4
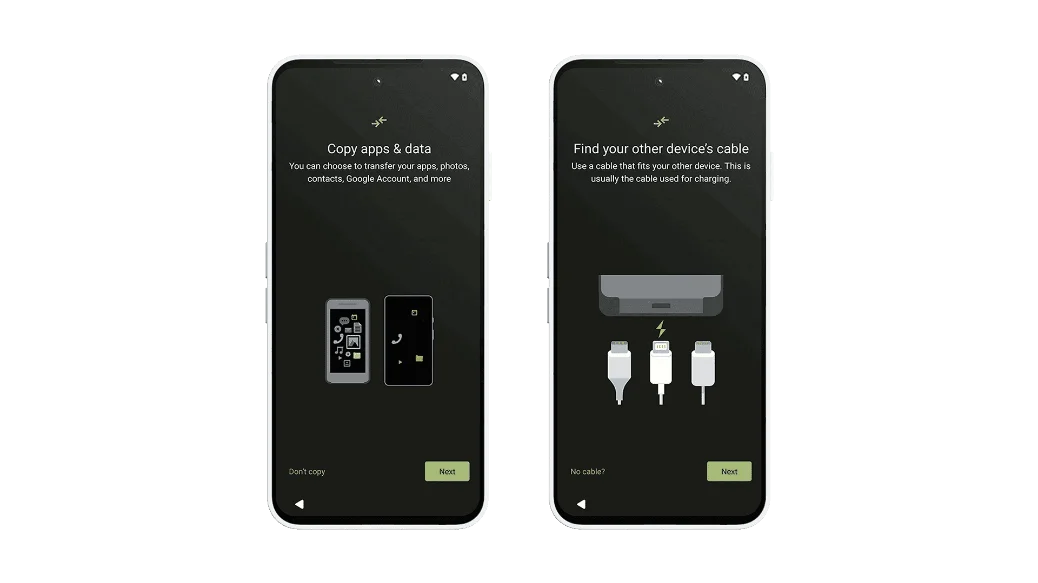
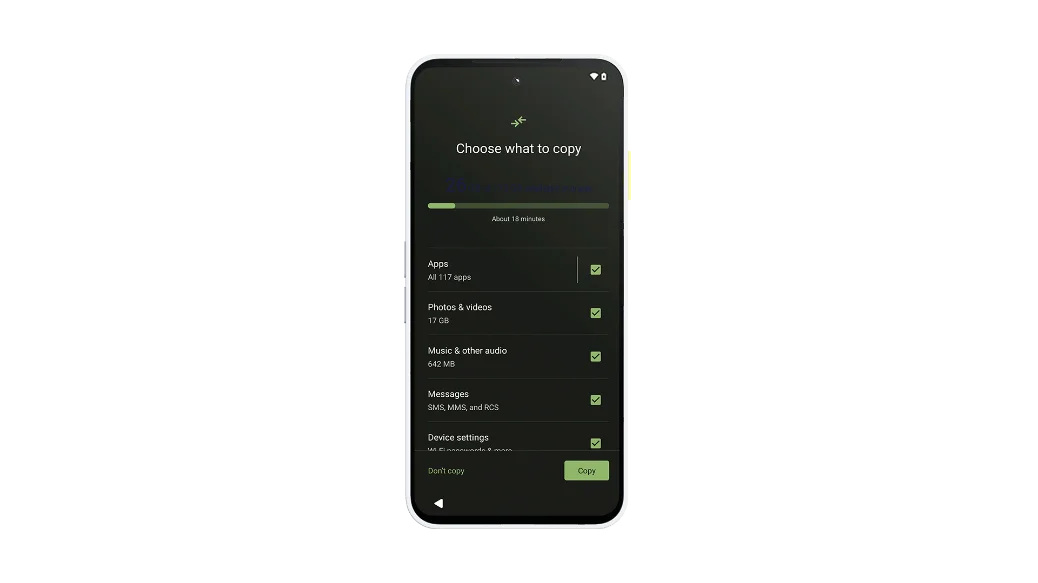
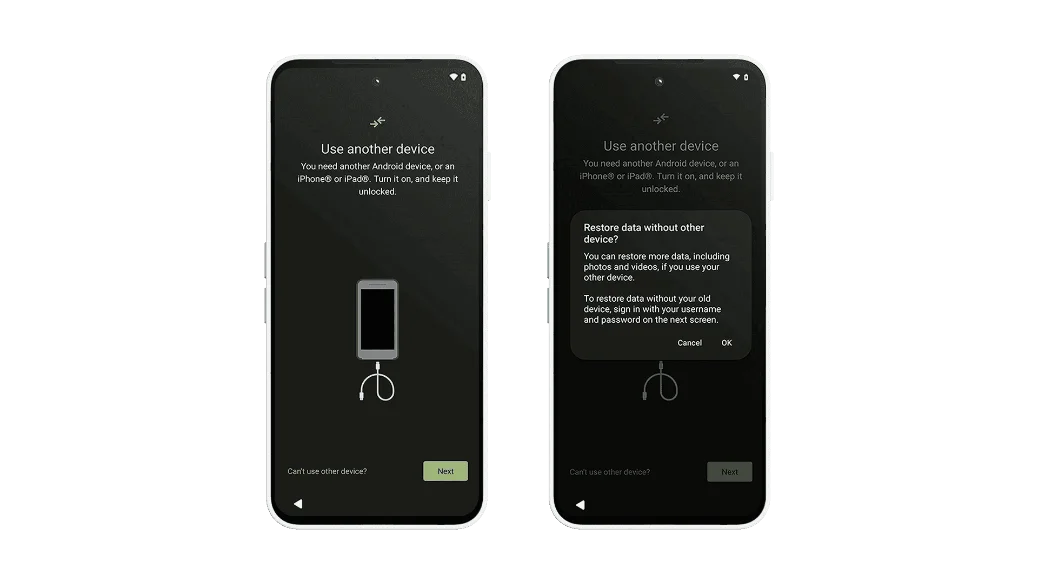
- To copy apps & data, tap Next until you're asked to find a cable.
- Tip: This is usually the cable used for charging.
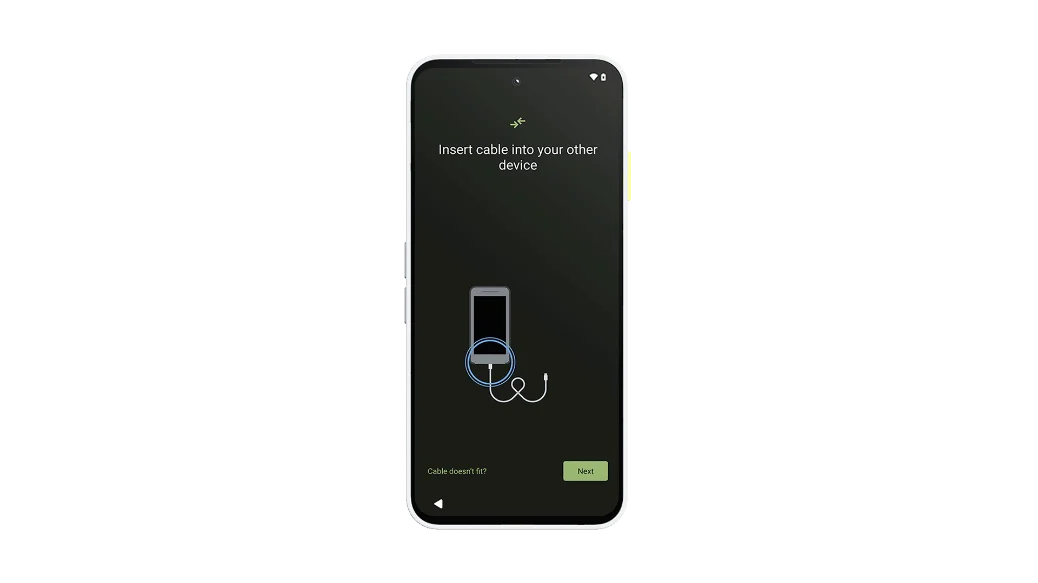
Step 5
- Insert the cable into your old device, then tap Next.
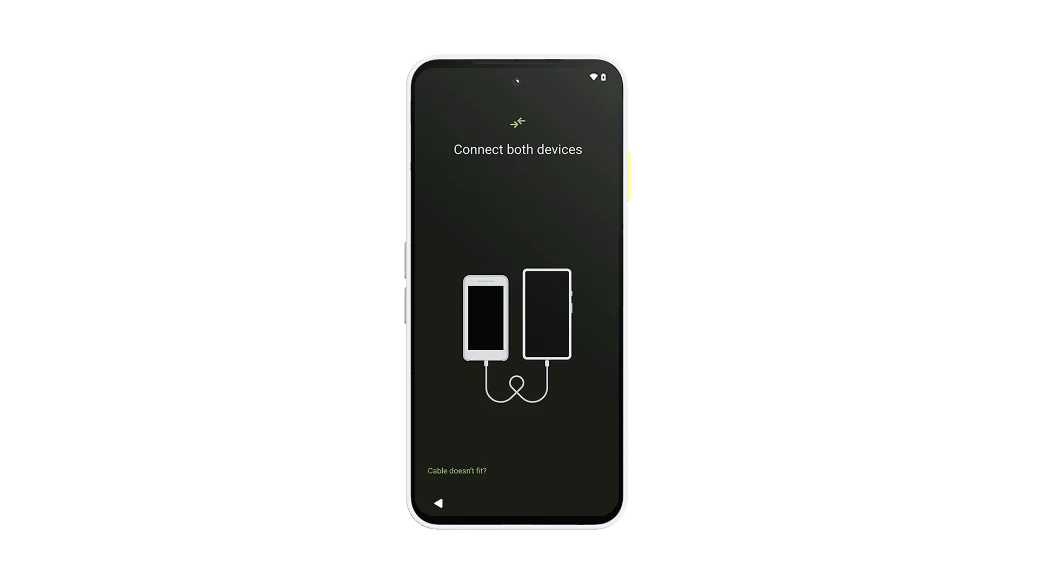
Step 6
- Insert the other end into your new Fairphone.
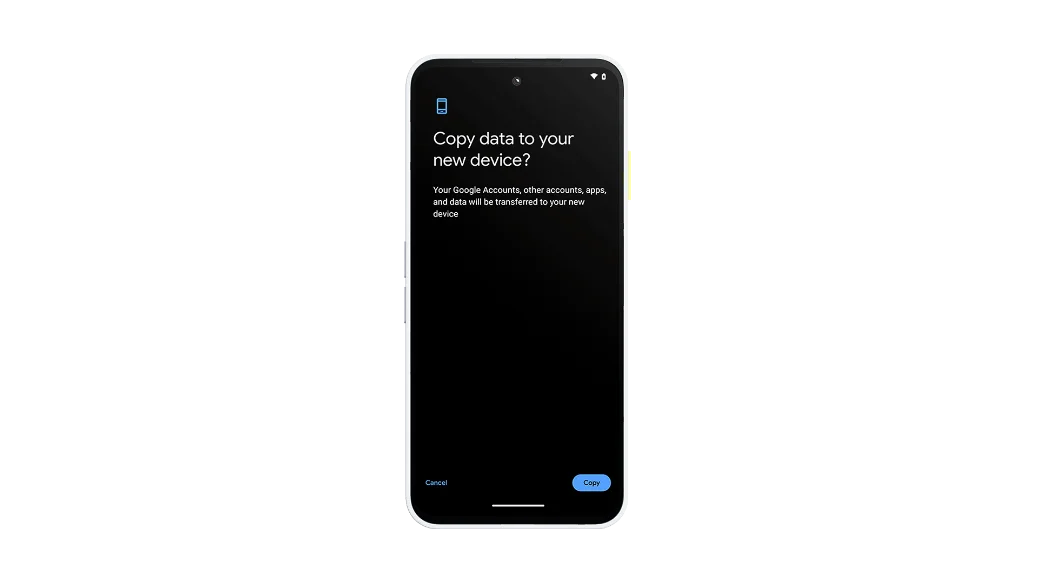
Step 7
- Unlock your old device and tap Copy.

Step 8
- Continue to finish the setup process on your Fairphone.
- Keep your devices connected while your data finishes copying.

Before you start
- Charge both devices.
- If you don't have one, create a Google account.
- On your old device:
- Make sure you can unlock it with a PIN, pattern, or password.
- Connect to a stable Wi-Fi network.
- Back up your data.
Step 1
- Turn on your new Fairphone and tap Start.
Step 2
- Connect to a mobile network:
- Insert a SIM card or tap Download a new eSIM.
- Tap Skip.
OR
Step 3
- Connect to Wi-Fi:
- Tap your network name to connect.
Step 4
- To copy apps & data, tap Next until you're asked to find a cable.
Step 5
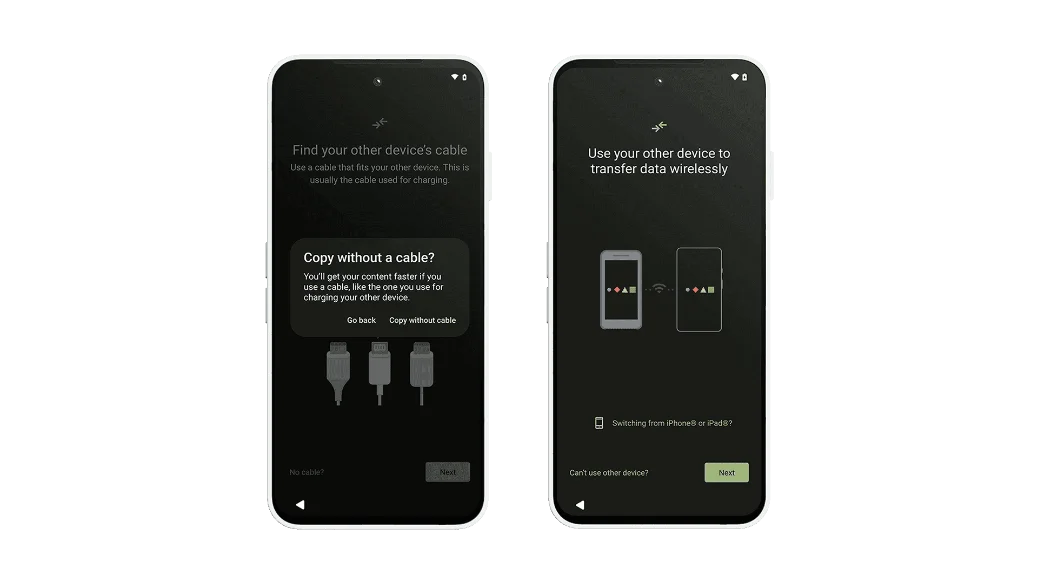
- Tap No cable → Copy without cable → Next.
- Tip: Copying your data without a cable may take longer.
Step 6
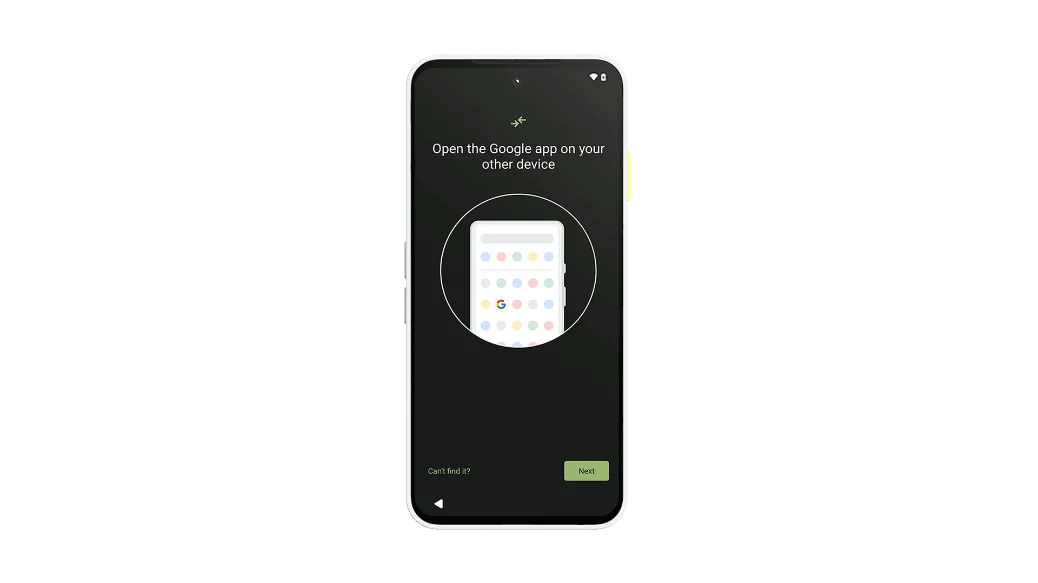
- Open the Google app on your old device.
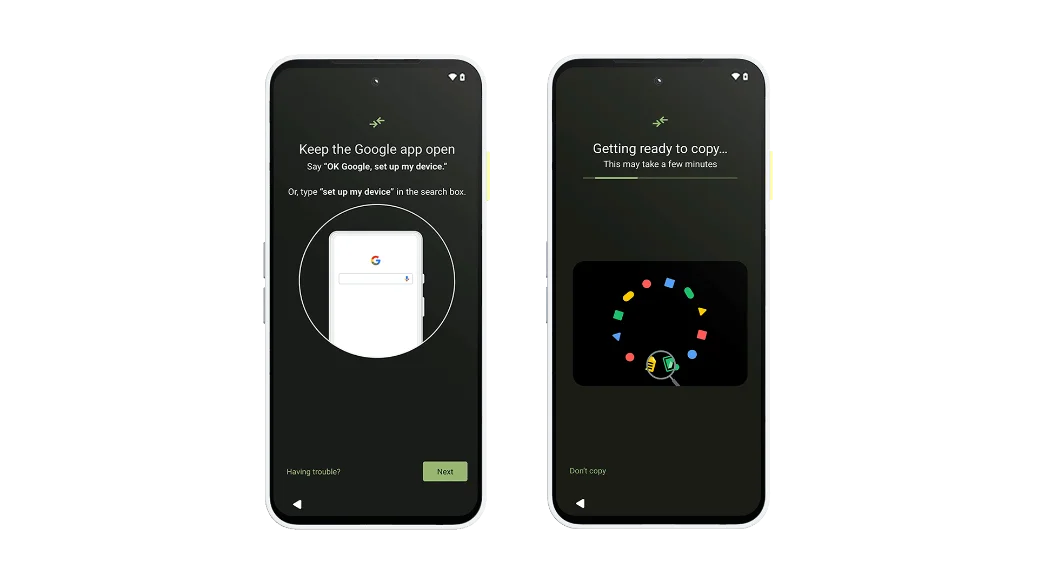
Step 7
- Tap Search and type "set up my device".
Step 8
- Continue to finish the setup process on your Fairphone.
- Keep your devices connected while your data finishes copying.

Before you start
- Charge your device.
- If you don't have one, create a Google account.
Step 1
- Turn on your new Fairphone and tap Start.
Step 2
- Connect to a mobile network:
- Insert a SIM card or tap Download a new eSIM.
- Tap Skip.
OR
Step 3
- Connect to Wi-Fi:
- Tap your network name to connect.
Step 4
- To copy apps & data, tap Next.
Step 5
- Tap Can't use old device → OK.
- Tip: You can restore more data if you use your old device.
Step 6
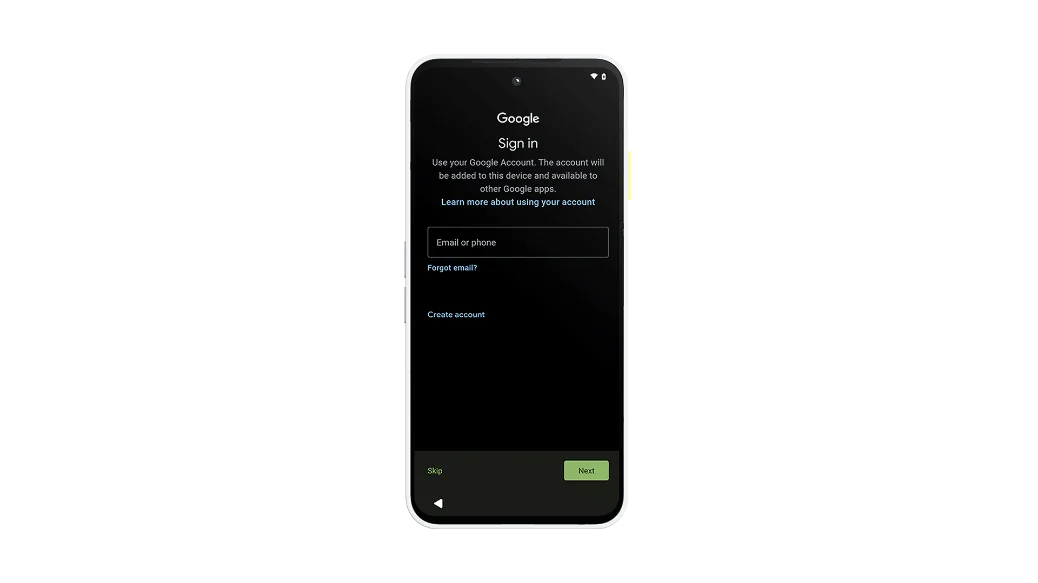
- Sign in with your Google account.
Step 7
- Continue to finish the setup process on your Fairphone.
- Keep your device connected to WiFi while your data finishes downloading.
Before you start
- Charge both devices.
- If you don't have one, create a Google account.
- On your old device:
- Make sure you can unlock it with a PIN, pattern, or password.
- Connect to a stable Wi-Fi network.
- Back up your data.
Step 1
- Turn on your new Fairphone and tap Start.
Step 2
- Connect to a mobile network:
- Insert a SIM card or tap Download a new eSIM.
- Tap Skip.
OR
Step 3
- Connect to Wi-Fi:
- Tap your network name to connect.
- Tap Set up offline.
OR
Step 4
- To copy apps & data, tap Next until you're asked to find a cable.
- Tip: This is usually the cable used for charging.
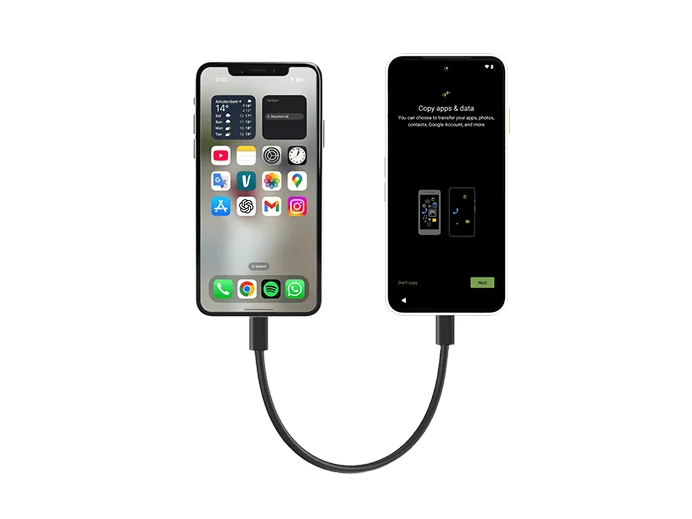
Step 5
- Insert the cable into your old iPhone®, then tap Next.
Step 6
- Insert the other end into your new Fairphone.
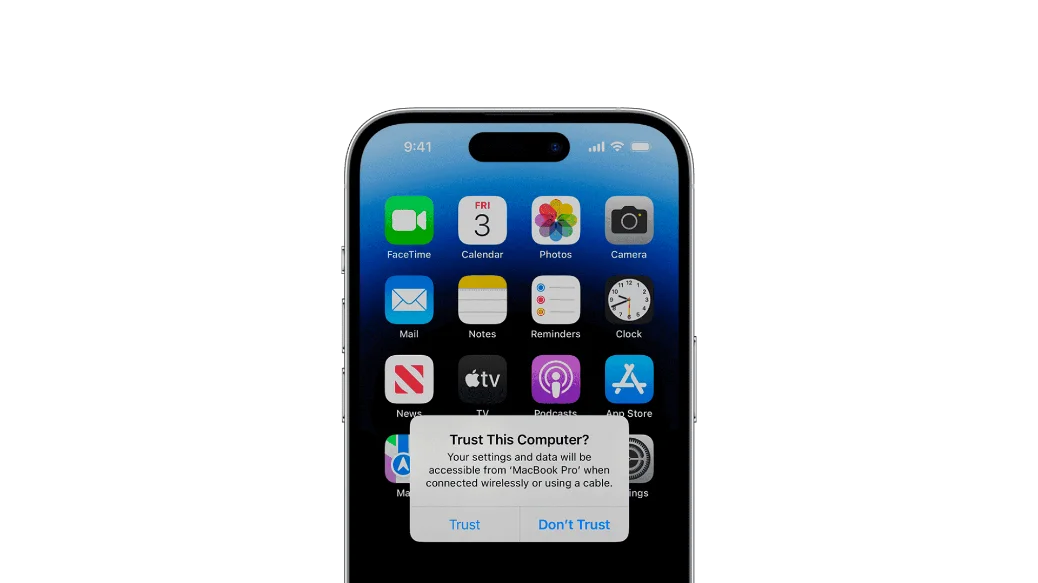
Step 7
- On your iPhone®, confirm it's OK to connect.
Step 8
- Sign in to your Google Account on your Fairphone.
Step 9
- Choose what to copy from your iPhone® and continue to finish the setup process on your Fairphone.
- Keep your devices connected while your data finishes copying.

Step 10
- Remember to turn off iMessage on your iPhone® before continuing to use your Fairphone.

Before you start
- Charge both devices.
- If you don't have one, create a Google account.
- On your old device:
- Make sure you can unlock it with a PIN, pattern, or password.
- Connect to a stable Wi-Fi network.
- Back up your data.
Step 1
- Turn on your new Fairphone and tap Start.
Step 2
- Connect to a mobile network:
- Insert a SIM card or tap Download a new eSIM.
- Tap Skip.
OR
Step 3
- Connect to Wi-Fi:
- Tap your network name to connect.
Step 4
- To copy apps & data, tap Next until you're asked to find a cable.
Step 5
- Tap No cable → Copy without cable → Switching from iPhone® or iPad.
- Tip: Copying your data without a cable may take longer.
Step 6
- Sign in to your Google Account on your Fairphone.
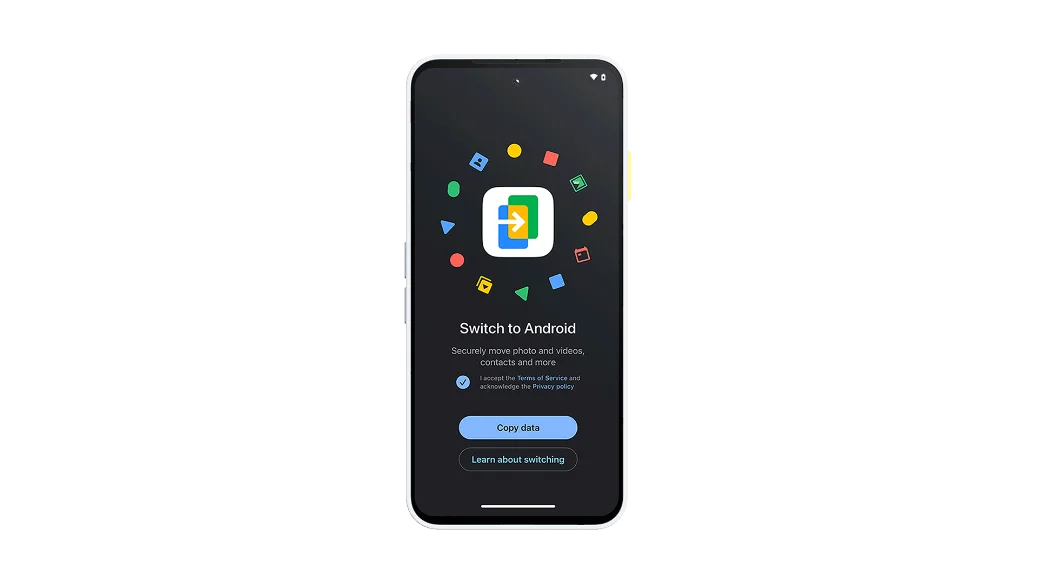
Step 7
- Download the “Android Switch” app on your iPhone® from the App Store.
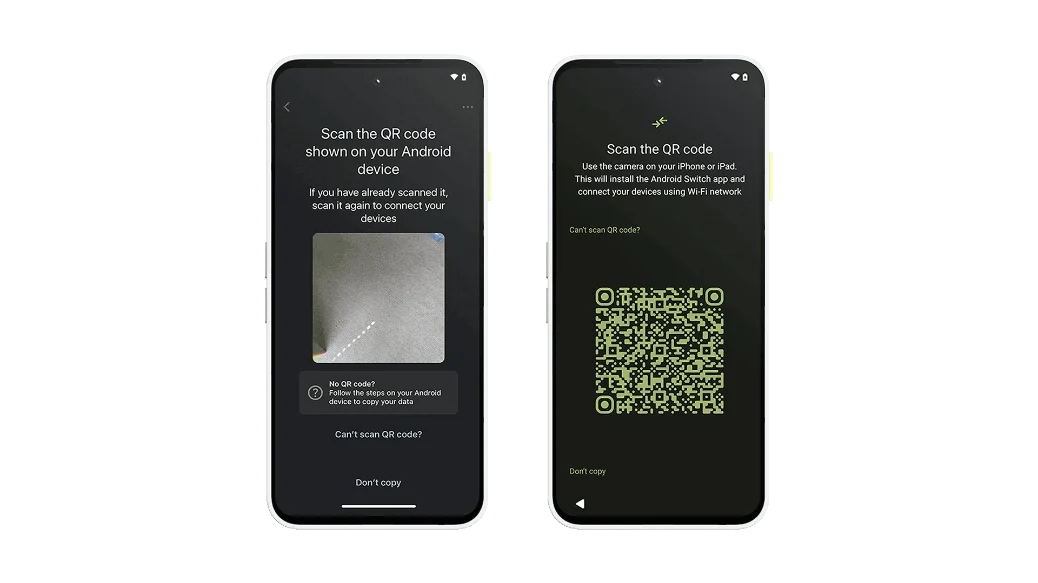
Step 8
- Follow the instructions on the Android Switch app on your iPhone®. It will ask you to scan QR codes on both devices to link them up.
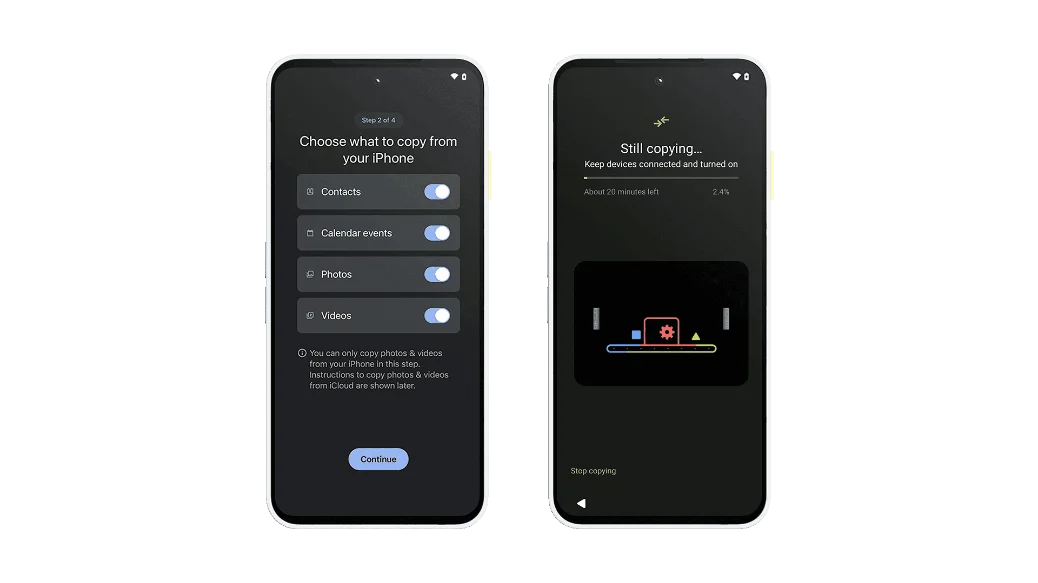
Step 9
- Choose what to copy from your iPhone® and continue to finish the setup process on your Fairphone.
- Keep your devices connected to WiFi while your data finishes copying.
Step 10
- Remember to turn off iMessage on your iPhone® before continuing to use your Fairphone.
Check your old phone’s website
Unfortunately, we won’t be able to help you without more details. We suggest visiting the website of your old phone’s brand or contacting their support team for assistance.
Discover Android
Get the most out of your phone
Add extra storage with an microSD card
Back up your data automatically
Customize your home screen and more
Keep tabs on your phone usage
Extend battery life with charging modes
Make your device easier to use
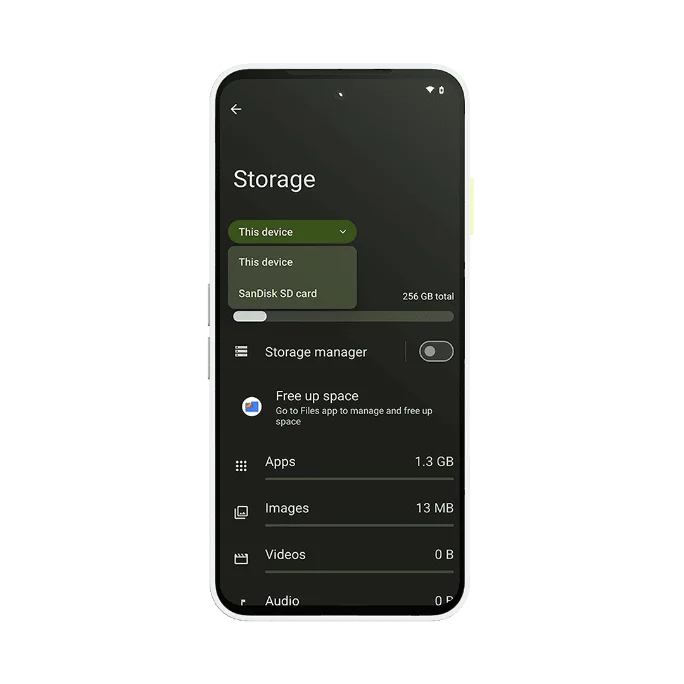
Add extra storage with an microSD card
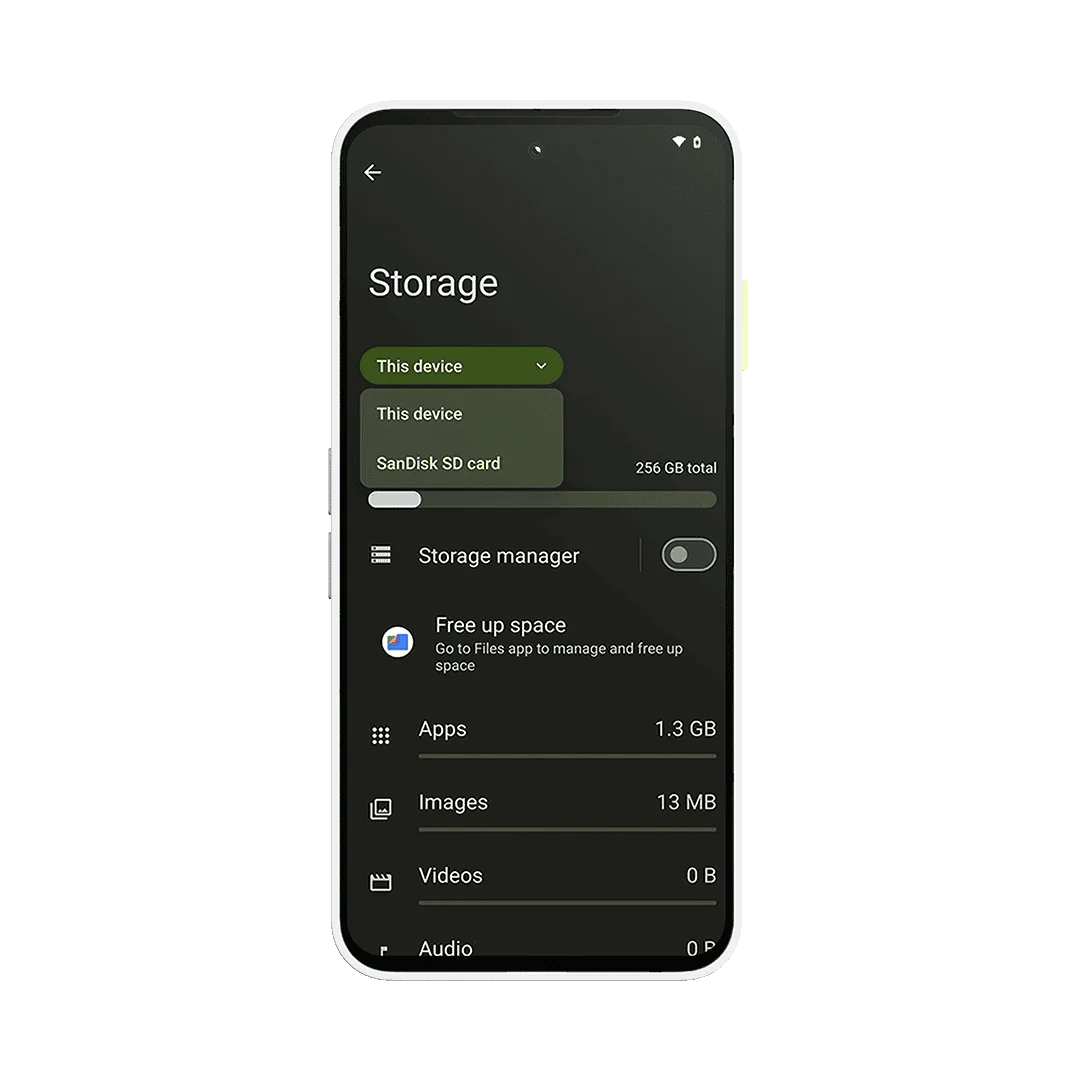
With Fairphone, you can always upgrade your onboard storage by adding an external microSD card. This can scale up your device space up to a whopping 2TB, which is more than enough for all your photos, videos, and other data. When it comes to choosing the right card for your device, we recommend picking one with a fast read/write speed.
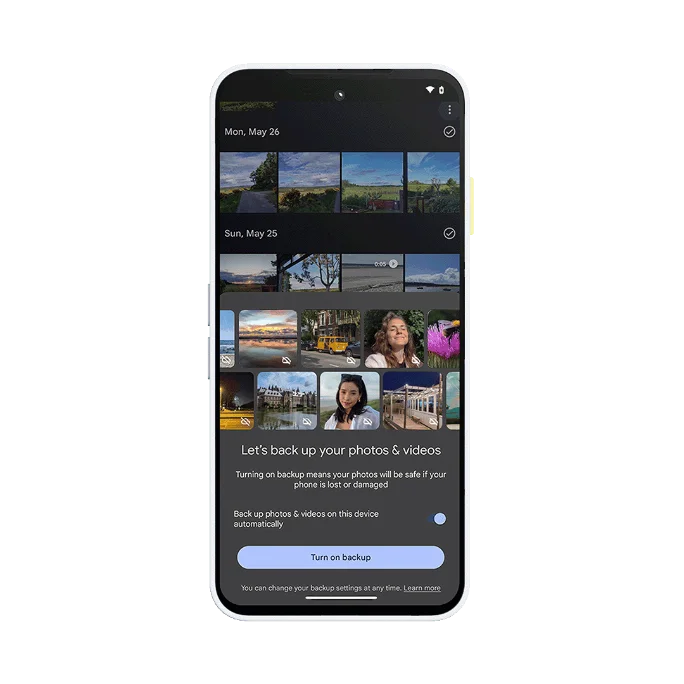
Back up your data automatically
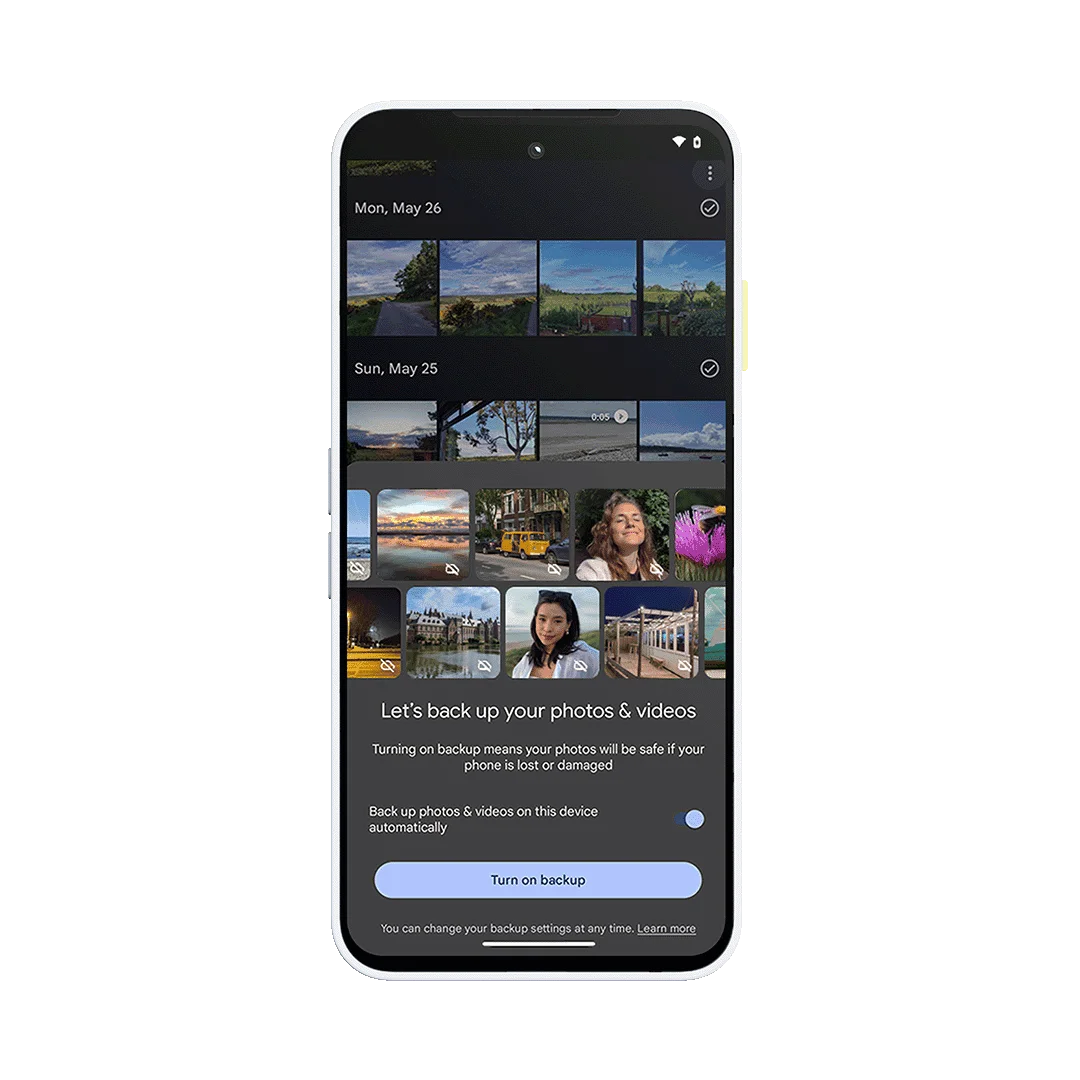
Take advantage of your Google account and back up your photos and videos automatically to the cloud through the Google One service. All you have to do is switch on automatic back-ups within Google Photos and all your precious memories will be accessible to you across devices. If you’re logged into your Google account on your Android device, it will also automatically back up your apps, contacts, and other system settings from time to time, making data migration that much more convenient.
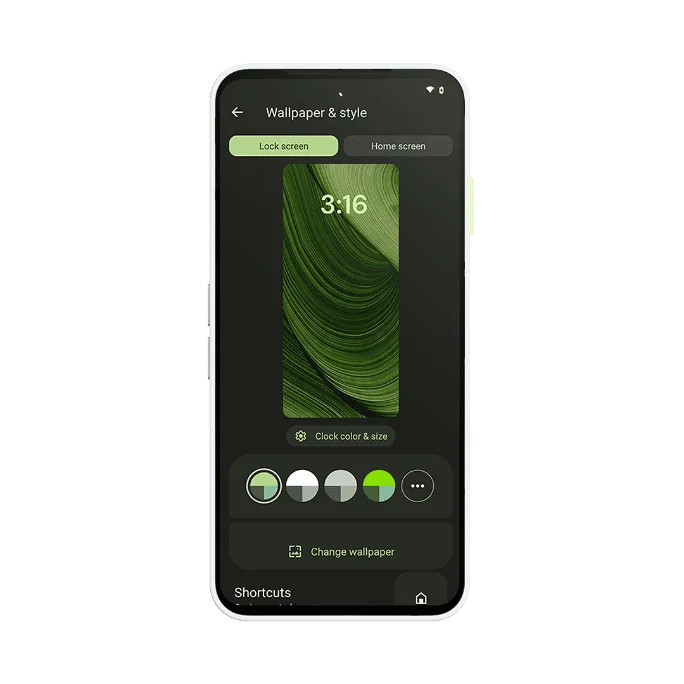
Customize your home screen and more
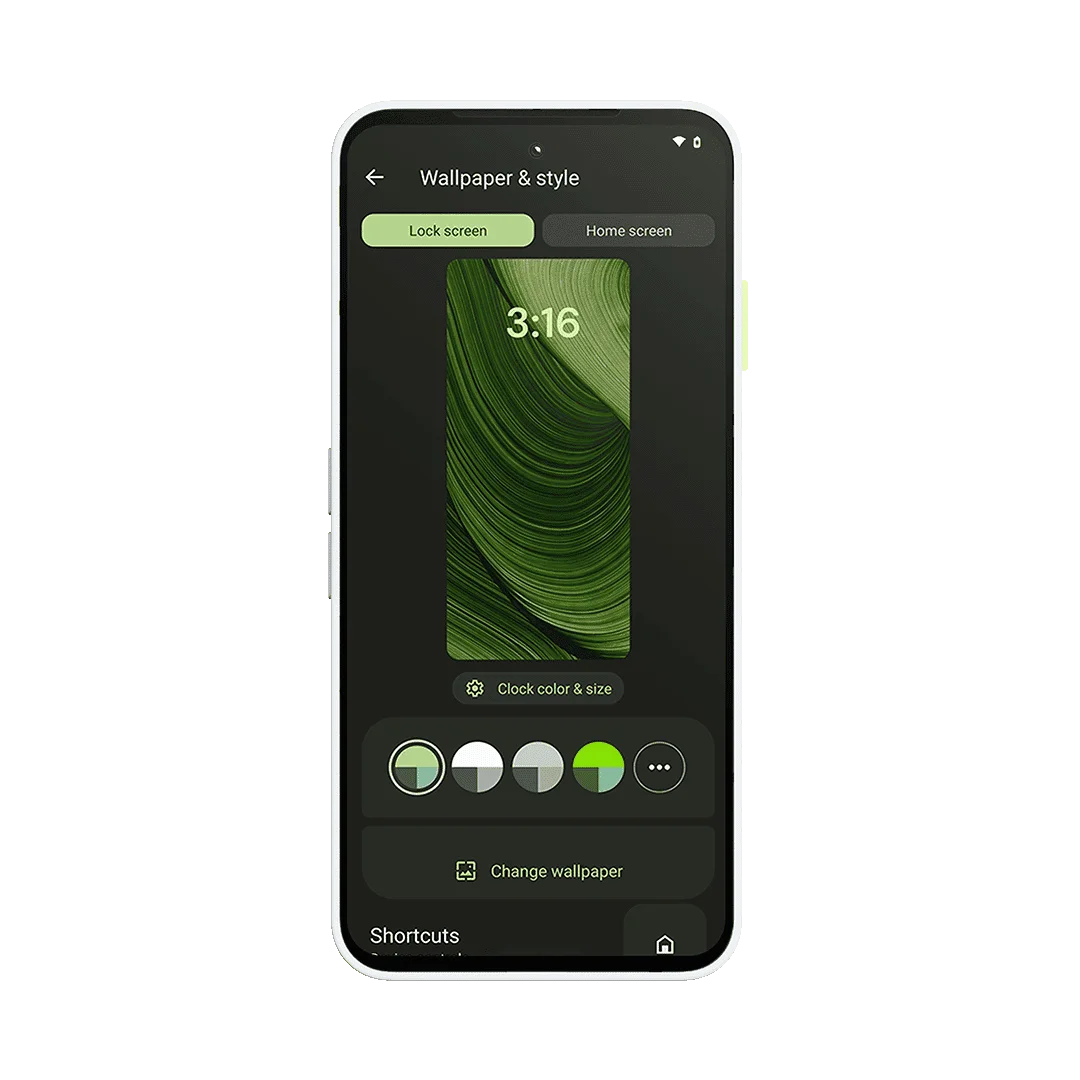
If you want to customize your home and lock screens, press and hold on an empty space. This will bring up a pop-up menu which you can to use to add widgets, change the wallpaper, and tweak home settings. Changing the wallpaper will also adjust the color palette of your device to match it. You can also customize the exact colors if you’d like, as well as the fonts, font sizes, and grid layouts. There are even more options available in your settings. For example, try toggling Dark Mode, which will flip your colors to darker backgrounds and hues. Some people find this easier on the eyes.
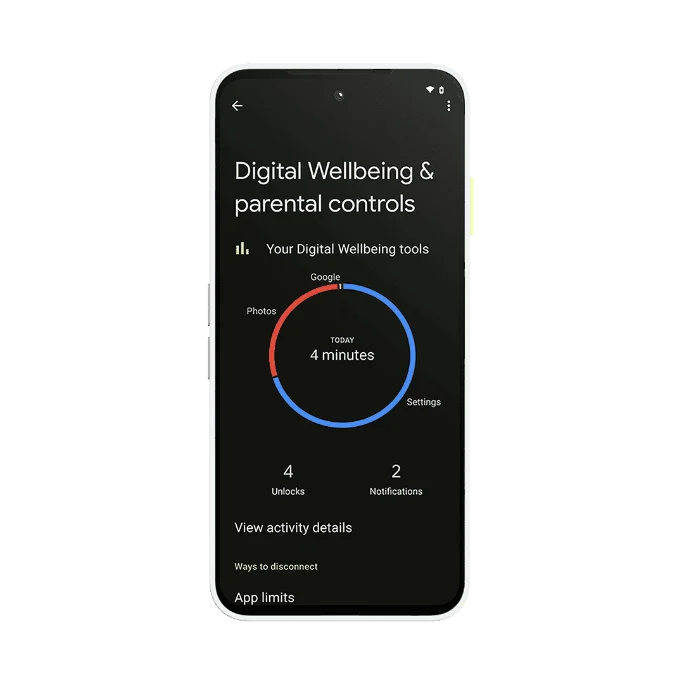
Keep tabs on your phone usage
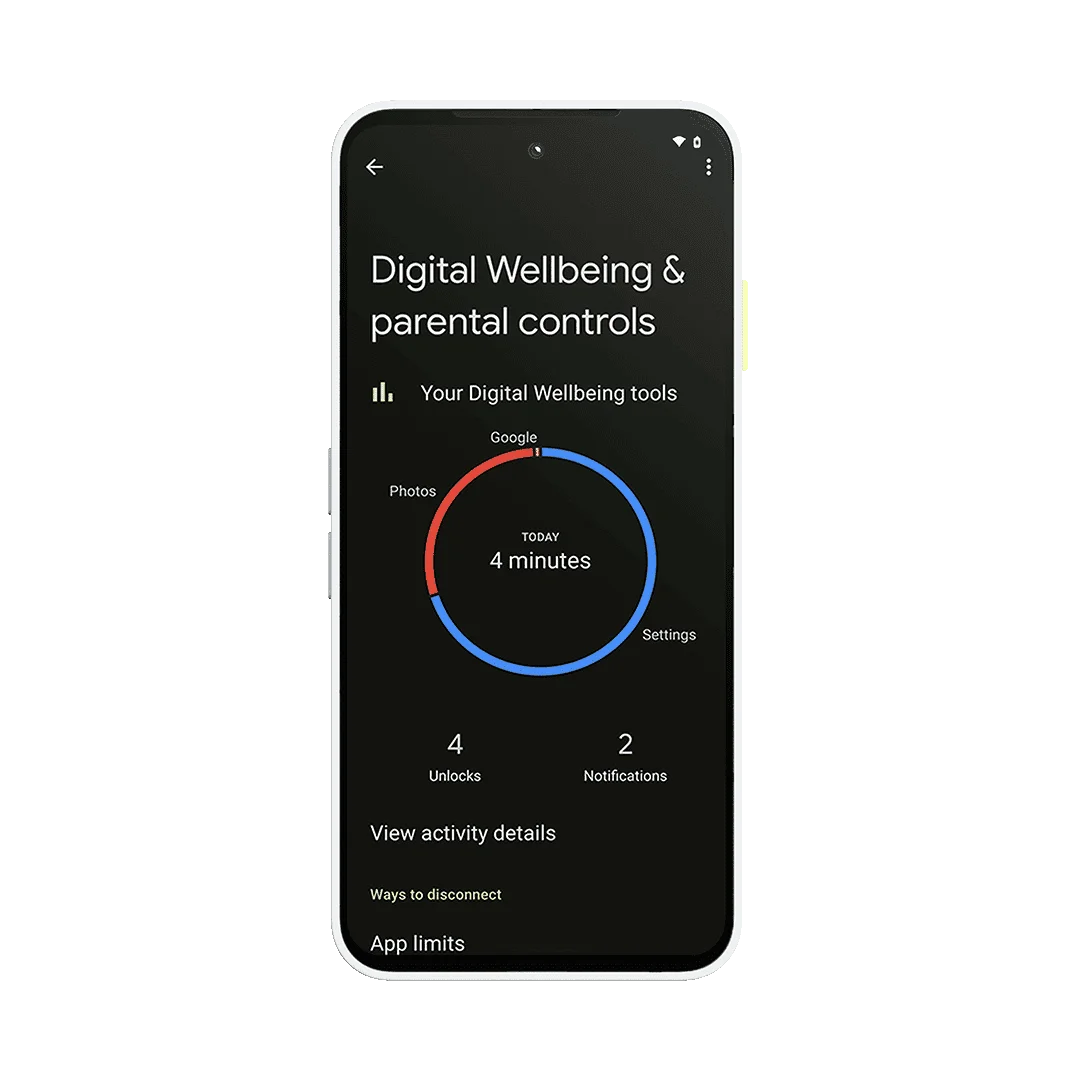
If you’re concerned that you’re spending too much time on your phone, you’ll love the Digital Wellbeing corner in your Fairphone. Parked in your settings, it gives you a clear overview of your phone behavior on a daily and weekly basis. You get to see all sorts of data from how much time your display has been on, to what apps you have been using the most, to how many times you’ve unlocked your device. Here, you can also set app timers if you’d like, switch on bedtime mode, or experiment with focus modes.
With The Fairphone (Gen. 6), we have taken it one step further with Fairphone Moments. Flip of the lime switch on the side and turn on a brand new minimalist mode that allows you to truly be in the moment and focus on what matters. No pings. No noise.
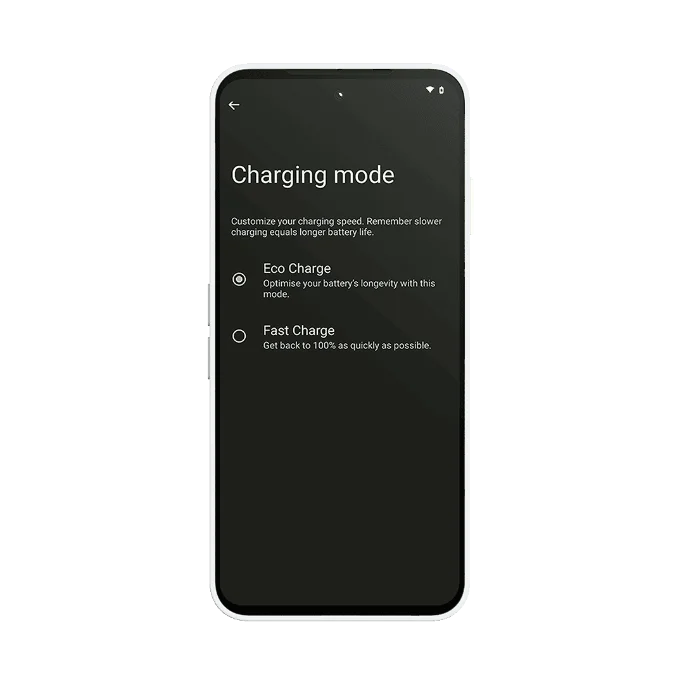
Extend battery life with charging modes
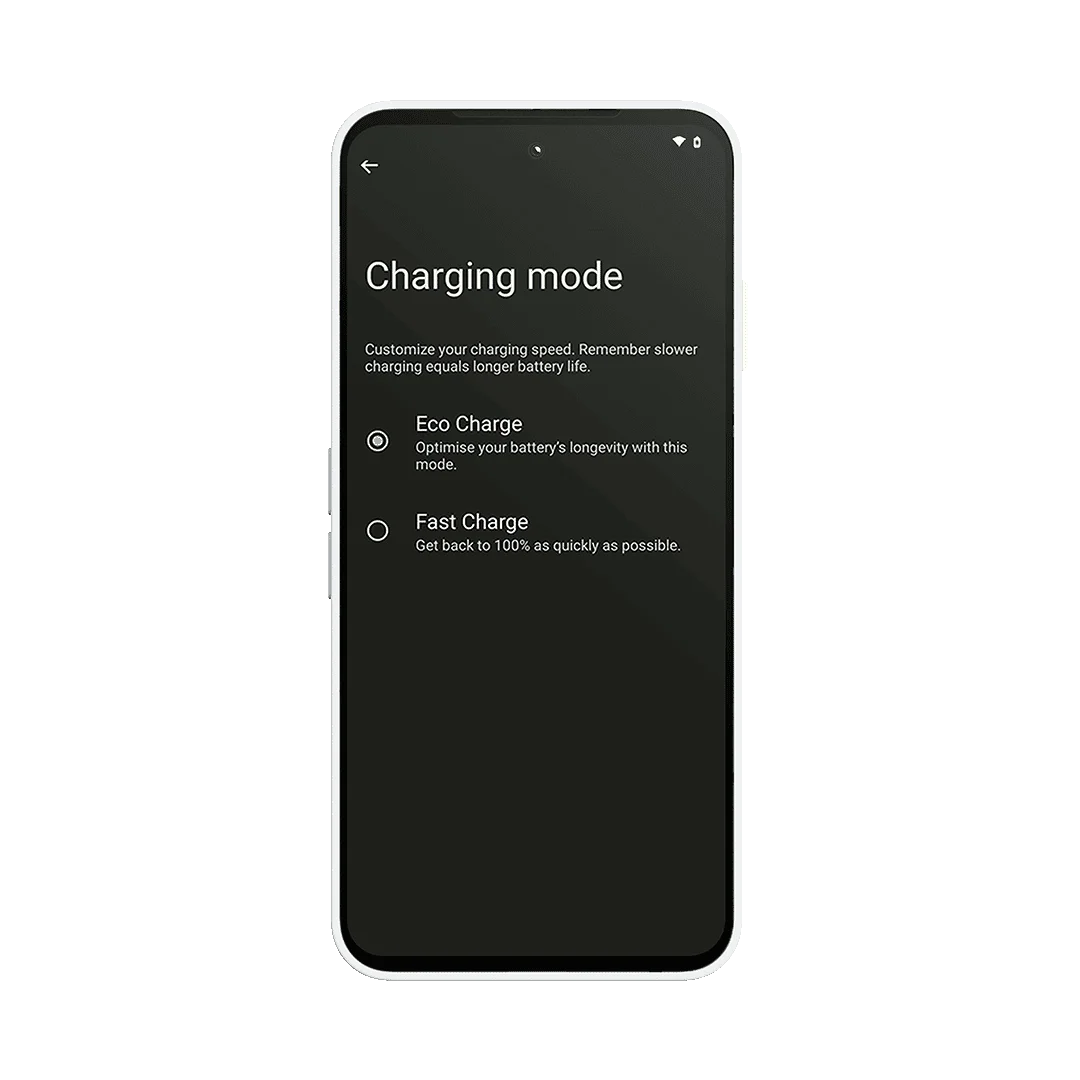
How your phone charges can also help to extend the battery’s life in the long run. Your Fairphone comes with two charging modes that you can choose between depending on the situation. Eco Mode is what we recommend for regular day-to-day charging; this ensures your battery is getting it power at optimum speeds and levels. But if you’re in a time-crunch, switch on Fast Charging Mode and your battery will push it to the max, charging up much faster than normal.
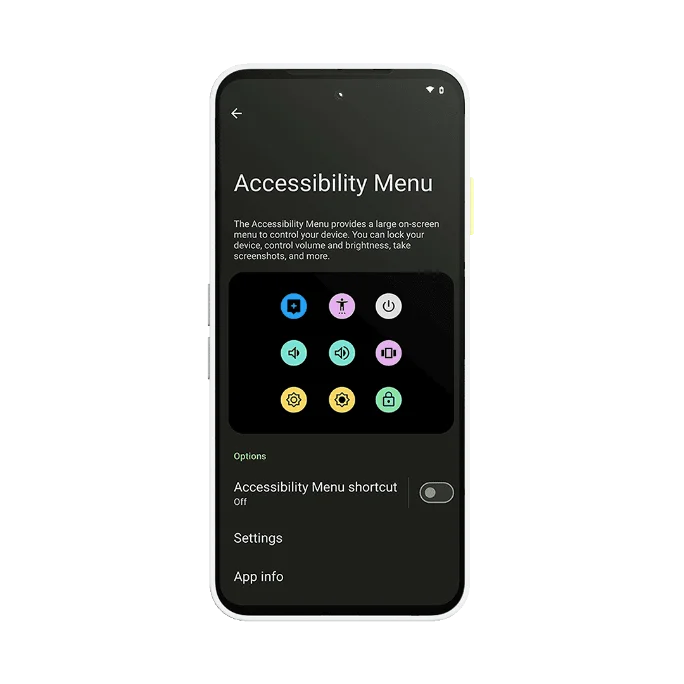
Make your device easier to use
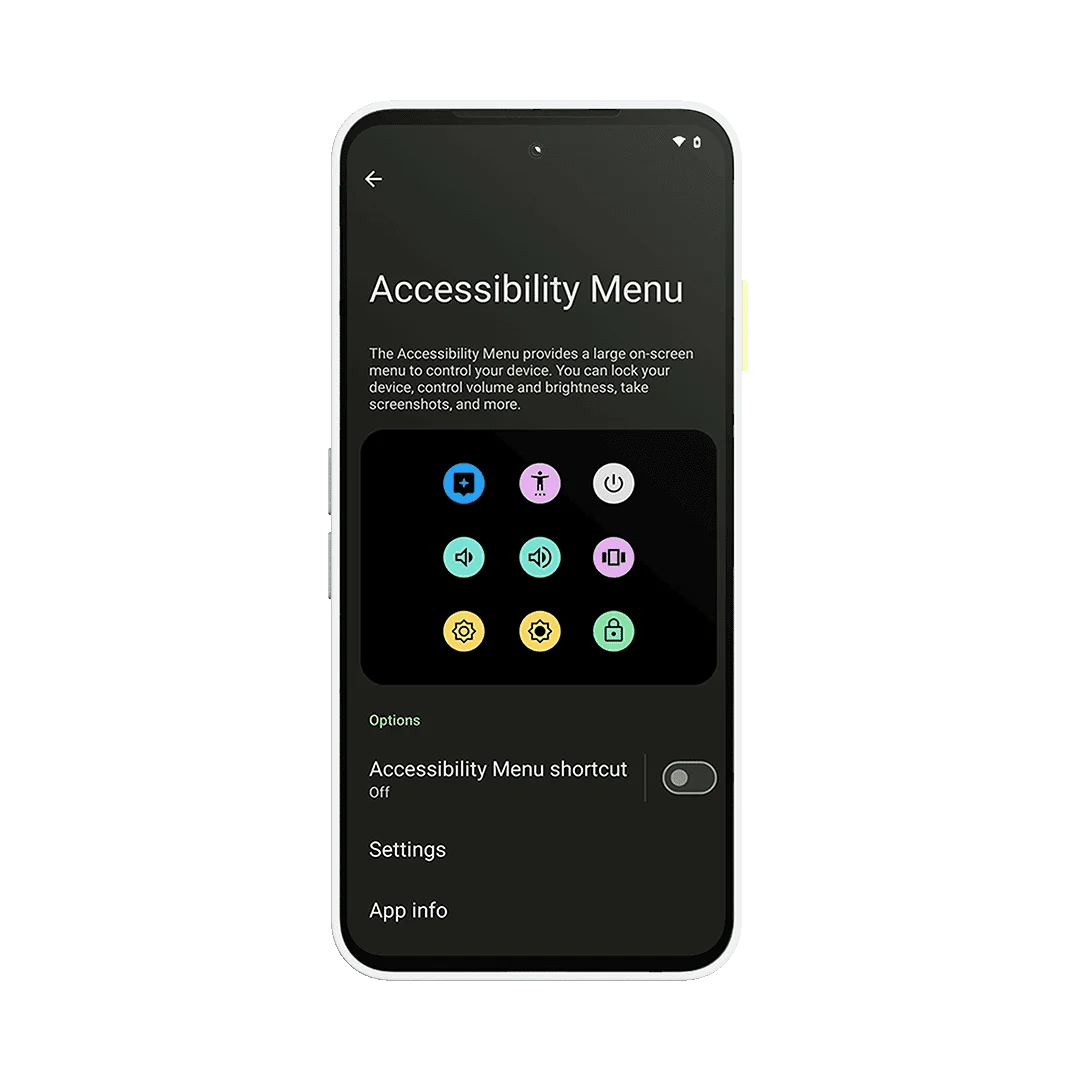
Thanks to improved accessibility settings, Fairphones are usable for all with varying accessibility needs. To name just a few examples, you’ll find in the Settings app options for screen readers, voice controls, font sizes, color correction, touch controls, captions, and hearing aid preferences. All of which you can set up and easily access with shortcuts.
Keep your Fairphone longer
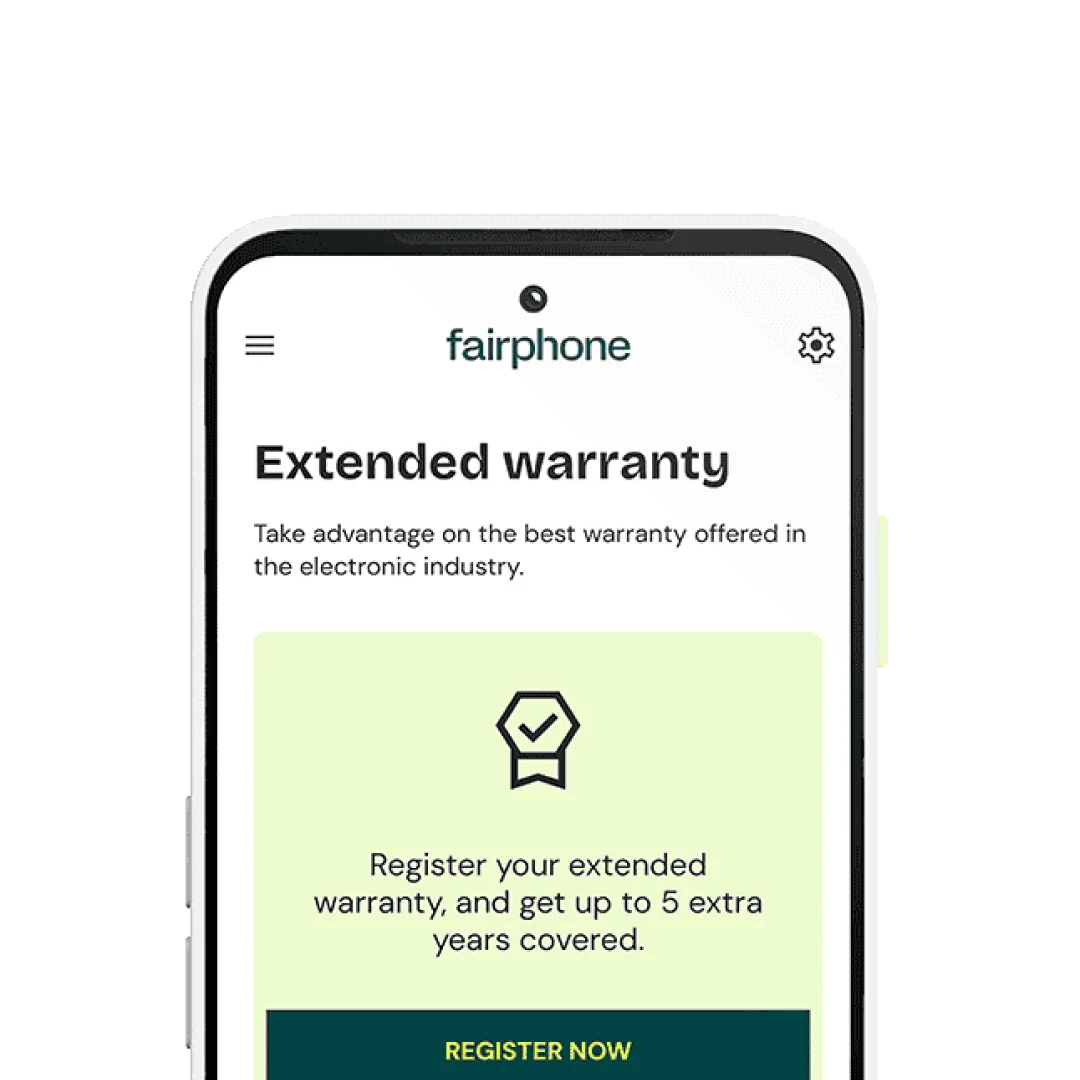
Register for a free three-year extended warranty
Log in to the My Fairphone app and register your device to unlock five years of warranty coverage in total.
Track your Fairphone journey
See the past, present and future of your Fairphone experience. Helps you keep your phone for longer and saves you money in the process.
How long can you keep your Fairphone going?
Get even more from My Fairphone
Tips, tricks and tutorials
Latest news and stories
Repair guides and support
Longevity should be rewarded
Welcome to Keep Club
Our unique loyalty program rewards you for keeping your phone longer with points that you can use on our webshop.
Earn Keep Club points
Spread the word
Your unique referral code gives your friends solid discounts AND earns you even more Keep Club points.
Refer a friendReuse and Recycling Program
Send us your old device to unlock extra savings
Old phone? We’ll take care of it. And reward you for it. Simple as that.
Already got a Fairphone?
Mix it up.
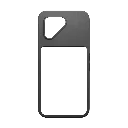
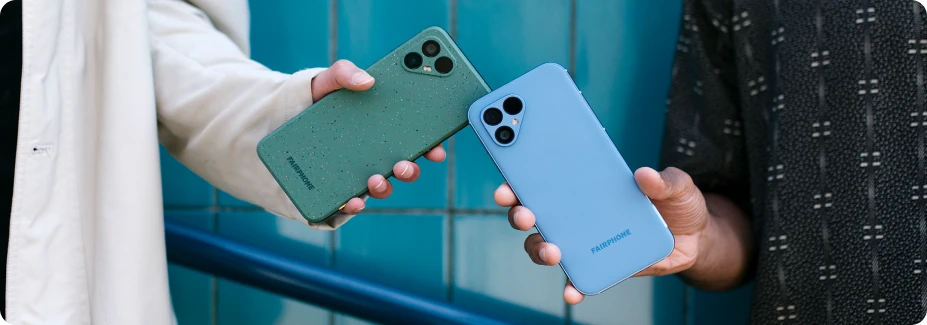
Accessories
Dress up your Fairphone your way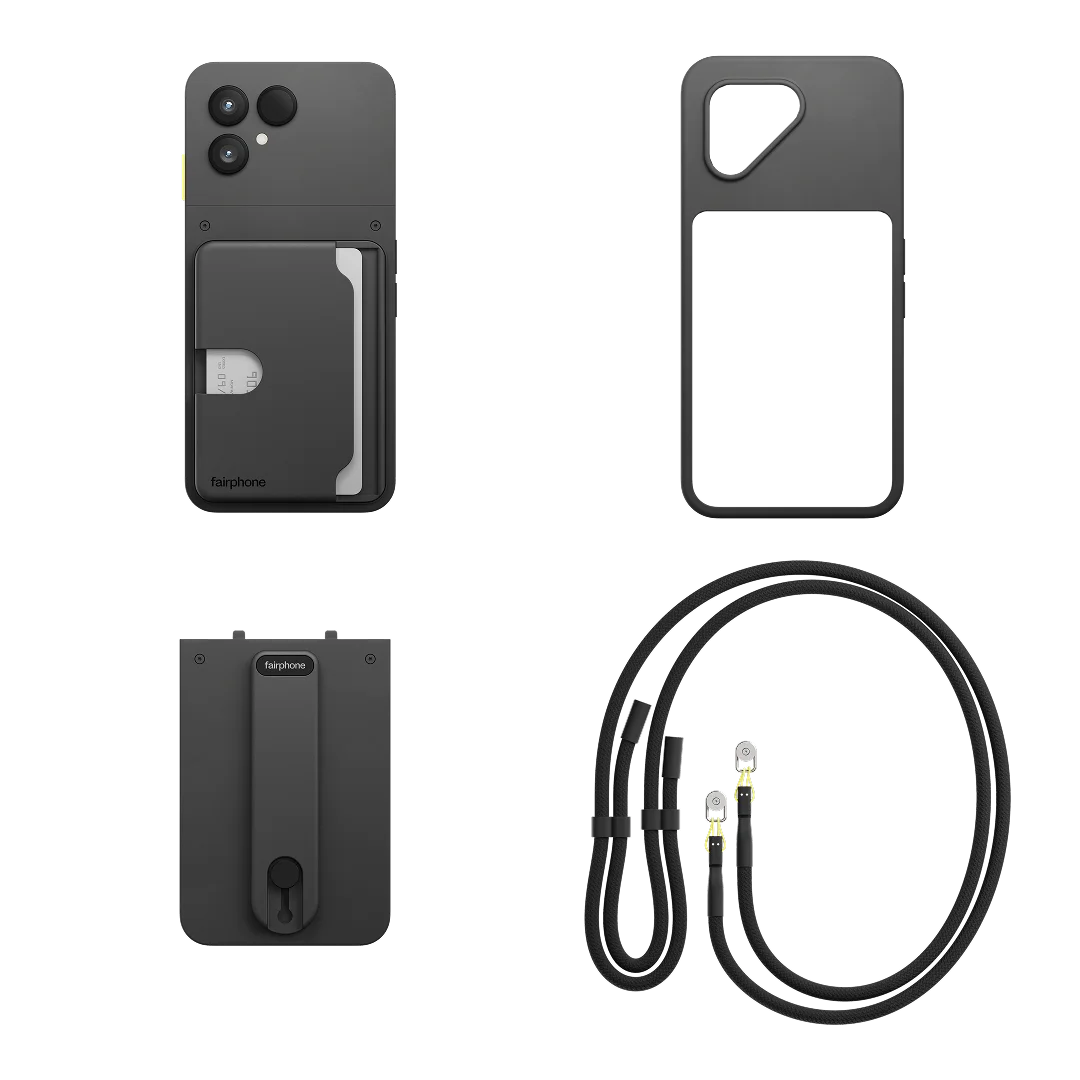
Say hello to your next smartphone

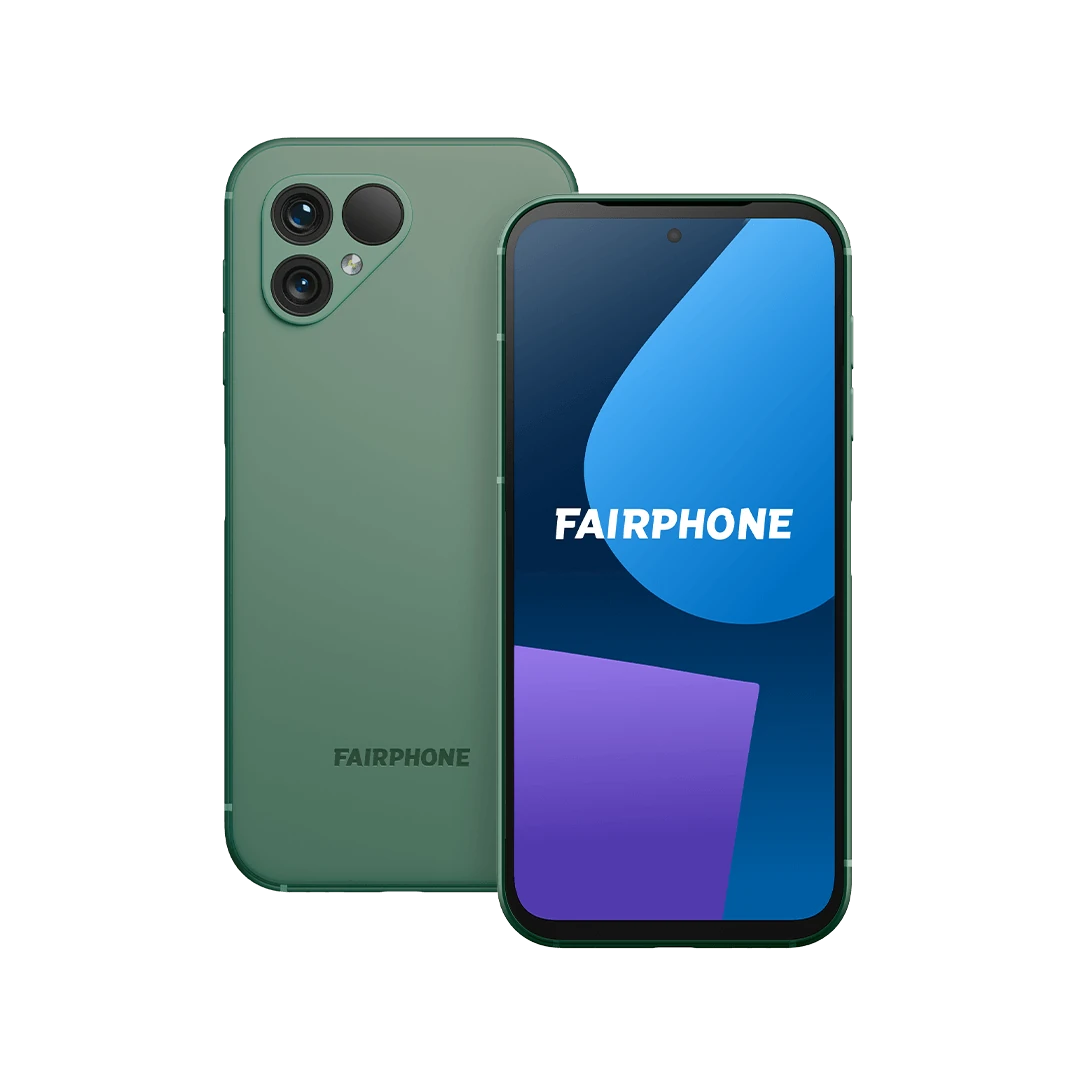
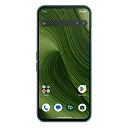
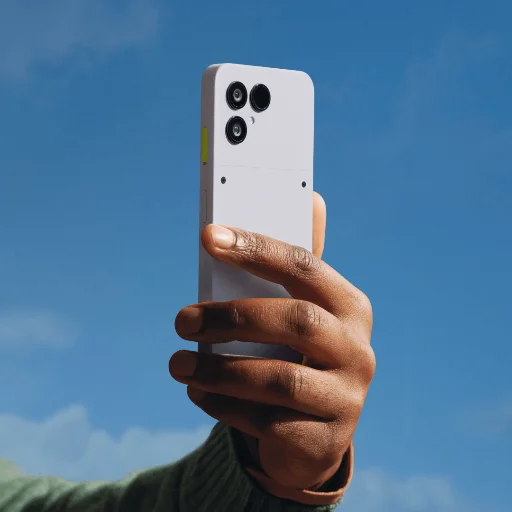
The Fairphone (Gen. 6)
Switch to a new kind of smartphone experience.
- Built to last
- Future-proof performance
- Iconic modular design
- Fairphone Moments: Two phones in one
iPhone® is a trademark of Apple Inc.